Dashboard Viewer Tasks
Creating a Dashboard View
To create a dashboard view for a selected entity:
1. Display the Dashboard Viewer.
2. Click
the New Dashboard icon (![]() ).
).
The Create Dashboard dialog box opens.
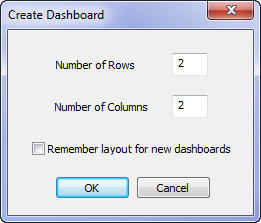
3. Specify the number of rows and columns you want to display your plots on (the maximum is 4×4).
To make the layout the default for each new dashboard that you create, click the Remember Layout For New Dashboards box.
4. Click OK.
The specified dashboard layout opens with placeholders that are ready to be populated.
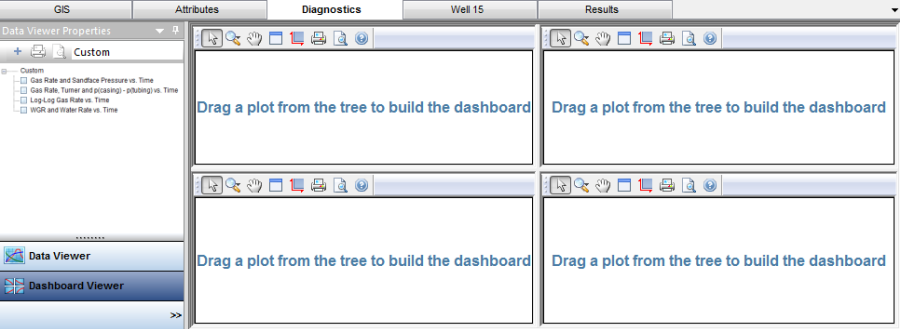
5. Populate the new dashboard with plots by either dragging-and-dropping the plot templates to their desired locations, or by clicking the checkboxes next to the available plot templates in the Data Viewer Properties pane. Note that when you click the checkboxes, the available slots in the dashboard layout are populated in a left-to-right fashion beginning with the top row. The dashboard view is reflected for each entity that you select, until a new dashboard is created.
Saving a Dashboard Template
To save your dashboard layouts for future access:
1. Click the Template drop-down menu and select Save/Delete Template.
The Save Template dialog box opens.
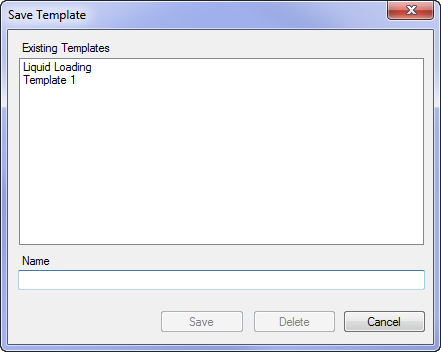
2. Specify a name for the dashboard view template; then click Save.
Deleting a Dashboard View
To delete a dashboard view:
1. Click the Template drop-down menu and select Save/Delete Template.
The Save Template dialog box opens.
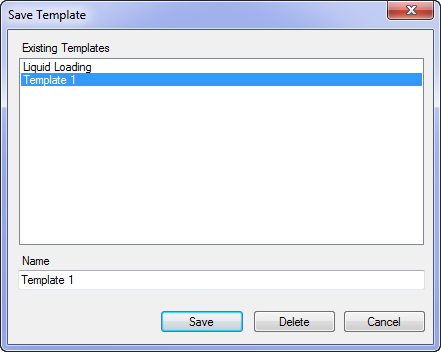
2. Select the dashboard view template that you want to remove, and click Delete. The template is removed from the list.
3. Click Cancel to close the dialog box. (This also saves your changes).