Importing a File / File as a Group
Data files can be of two different types: markup files or plain-content files. Their differences are as follows:
- Markup Files — annotated files that have specific formatting and contain tags to identify their contents. Harmony uses the tags to map the identified data. Along with production data, markup files also contain a partial list of attributes, which are displayed in the Attributes tab. Supported file types are listed below.
| File Type | File Extension | Sources |
|---|---|---|
| Merak | .mer | Geoscout |
| Dwight dmp2 | .dp2, .dmp2 | IHS |
| Value Navigator | .vna | Value Navigator |
| Lasser Data | .prn | Lasser Data |
| Aries | .axp | Aries. (IHS Accumap can save files in an Aries format.) |
| Geo Webworks | .mxp | Geo Webworks |
| Pressure ASCII Standard | .pas | IHS WellTest |
| 298 98c | .98c | IHS |
| Recorder | .rec |
- Plain-Content Files — files that contain data (often in columnar format) that is separated by a user-specified character (usually a comma), but lack the coded tags of a markup file. Examples include .txt and .csv files.
Importing Markup Files
To import a markup file, or a markup file as a group:
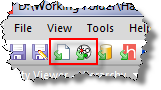
1. Click
the Import File icon (![]() ),
or Import File as a Group icon
(
),
or Import File as a Group icon
(![]() ) on the main toolbar.
) on the main toolbar.
The Import dialog box opens.

2. Select a markup file to import.
3. Click Open. If prompted to set datum, select a datum and click OK.
The data is automatically mapped in Harmony, and the new entities are displayed in the Hierarchy Groups pane. (If you imported the entities as a group, they are also displayed as a new custom group in the Custom Groups pane.)
Importing Plain-Content Files
To import a plain-content file, or a plain-content file as a group:
1. Click the Import File icon (![]() ),
or Import File as a Group
icon (
),
or Import File as a Group
icon (![]() ).
).
The Import dialog box opens.
2. Select a plain-content file to import.
3. Click Open.
The Import Data Type dialog box opens.

4. Select either Production or Attributes and click OK.
The Import Data dialog box opens.

The following options are available:
 (Open icon) — you can
select a different file to open for import. Options include Reset And Open and Open
Another File.
(Open icon) — you can
select a different file to open for import. Options include Reset And Open and Open
Another File. (Reset icon) — removes the
current file from the import operation.
(Reset icon) — removes the
current file from the import operation.- Options button — you can change the import options, including the standard operating conditions of the file to be imported and the configuration of the unit list. For example, if you deselect Continuous time track (always on for Cumulative Time), you can import monthly production data that is reported either on the first day of each month, or on the last day of each month. For additional information, see Continuous Time Track.
- Separate...button (Available only if Production data is chosen; not available for Attributes.) — you can specify a Well Name column in the original worksheet and subsequently list multiple wells in the same worksheet. Assigning Well Identifier in the data column header divides the single import file into multiple entities for import, each one named according to an entity header attribute listed in the original file.
- Apply To...button — applies column header mappings in one worksheet to all of the other worksheet tabs in the spreadsheet file. The single import file generates multiple entities for importing, with each one named according to the original worksheet name.
5. To assign column headers, click the drop-down arrows at the top of each column. Drop-down menus will open, where you can assign data properties and units.
Note: You must assign a Time and Date Time column (when using Production data), and a Well Identifier and a second column (when using Attribute data).

If you have two columns with time information (e.g., 2010/01/01 and 00:00) and want to combine these columns, right-click one of the columns and select Combine Date / Time.
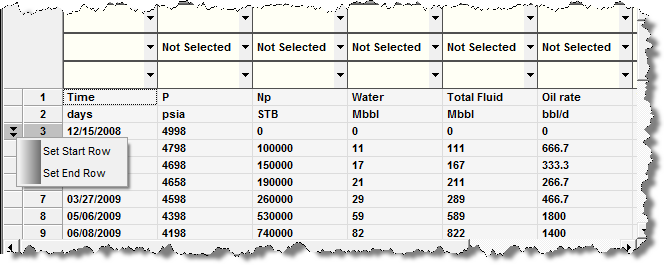
The Import Data utility assigns start and end rows to the dataset. The start row (the first entry populated in Harmony's production or attributes table) is indicated by two arrows pointing down in the far left column. The end row (the last entry populated in Harmony's production or attributes table) is indicated by two arrows pointing upwards in the far left column. Check that the correct rows are assigned as the start and end rows, and modify if necessary. To modify a row, right-click in the row, then select Set Start Row or Set End Row.
6. Once the desired column headings have been assigned, click OK.
Harmony imports the well data. Once the import process is complete, the new wells are listed in the Hierarchy Groups pane. (If you imported the wells as a group, they also appear as a new custom group in the Custom Groups pane.)
Importing Text Attribute Data
To import text attribute data:
1. Click the Import File icon (![]() ),
or Import File as a Group
icon (
),
or Import File as a Group
icon (![]() ).
).
The Import dialog box opens.
2. Select a markup file to import and click Open.
The Import Data Type dialog box opens.
3. Select Attributes, and then click OK.
The Import Data dialog box opens.

The following options are available:
- (Open icon) — you can
select a different file to open for import. Options include Reset And Open and Open
Another File.
- (Reset icon) — removes the
current file from the import operation.
- Options button — you can change the import options, including the standard operating conditions of the file to be imported and the configuration of the unit list. For example, if you deselect Continuous time track (always on for Cumulative Time), you can import monthly production data that is reported either on the first day of each month, or on the last day of each month. For additional information, see Continuous Time Track.
- Apply To... button — applies column header mappings in one worksheet to all of the other worksheet tabs in the spreadsheet file. The single import file generates multiple entities for importing, with each one named according to the original worksheet name.
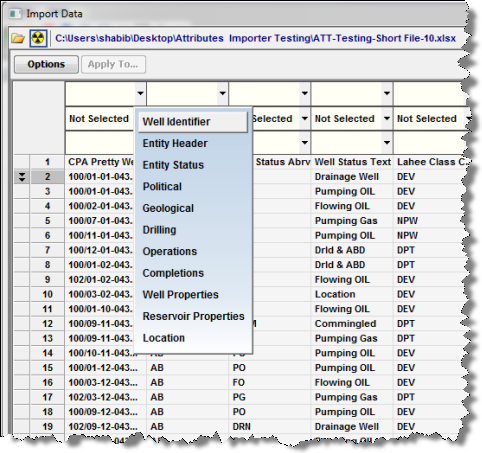
4. To assign column headers, click the drop-down arrows at the top of each column. Drop-down menus will open where you can assign data properties and units (where applicable).
Note: You must assign a Well Identifier and a second column.
If you select Location, you must convert latitude and longitude to a decimal notation. For additional information, see GIS Theory: Latitude / Longitude.

The Import Data utility assigns start and end rows to the dataset. The start row (the first entry populated in Harmony's production or attributes table) is indicated by two arrows pointing down in the far left column. The end row (the last entry populated in Harmony's production or attributes table) is indicated by two arrows pointing upwards in the far left column. Check that the correct rows are assigned as the start and end rows, and modify if necessary. To modify a row, right-click in the row, then select Set Start Row or Set End Row.
5. Once the desired column headings have been assigned, click OK.
The Select Worksheets to Import dialog box opens.
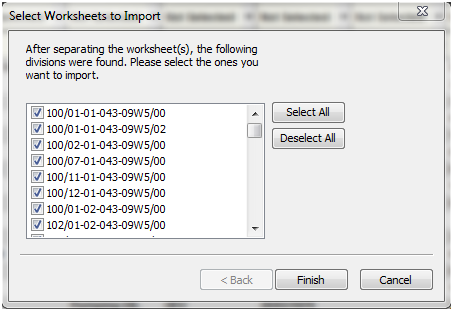
6. After selecting your entities to import, click Finish.
Harmony imports the well data. Once the import process is complete, the new wells are listed in the Hierarchy Groups pane. (If you imported the wells as a group, they also appear as a new custom group in the Custom Groups pane.)