Configuring the Well Hierarchy
By default, wells in the Well Tree are displayed alphabetically by well name. However, you can group wells using a custom hierarchy. In addition to the default hierarchy columns, any custom attributes that are a "text" type can also be used for the well hierarchy.
To configure the well hierarchy:
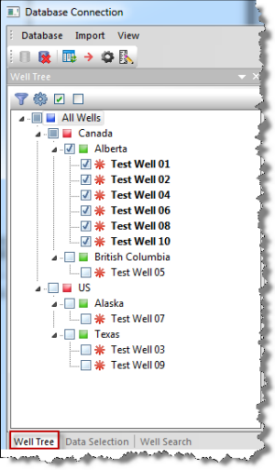
1. Connect to the Database Connection Tool; then click the Well Tree tab at the bottom.
2. Click
the Tree Hierarchy icon (![]() )
in the Well Tree pane.
)
in the Well Tree pane.

The Configure Well Hierarchy dialog box opens.
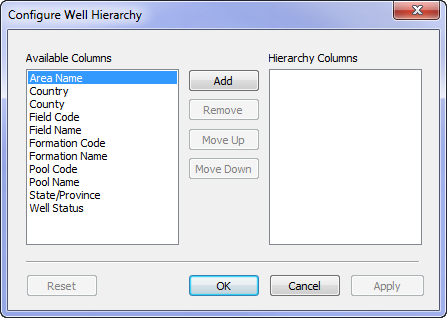
3. Create the hierarchy you want by doing one or more of the following:
- Add a column to the hierarchy by double-clicking the column name in the Available Columns list, or by selecting a column name and then clicking Add.
- Remove a column to the hierarchy by selecting the column in the Hierarchy Columns list; then click the Remove button.
- Move columns in the Hierarchy Columns list up or down by selecting the column name; then click Move Up or Move Down.
4. Click OK.
The Well Tree displays wells in the hierarchy you created.