PITA Workflow
Related Topics:
These procedures are provided as a guide for analyzing a perforation inflow/injection test analysis (PITA).
To follow the PITA workflow:
1. If the pressures build up (i.e., the pressure in the wellbore prior to perforating was less than the reservoir pressure), start a new PITA inflow project. If the pressures fall off, start a new PITA injection project. See Starting a Project for details.
2. Import your pressure data. ![]()
Note: Rate data is not required for a PITA analysis.
3. Click the Production Editor tab. The Select Data to Analyze dialog box will open. Ensure that the imported pressure dataset is displayed in the Active Pressure drop-down list and click OK. See Loading data into the Production Editor for more information. ![]()
4. Remove all data prior to perforating and after the build up (or fall off). See Deleting Data at the Start or End of the Production Editor for additional information. ![]()
5. Specify the reservoir fluid type. ![]()
6. Filter the data. We recommend filtering the data down to fewer than 5,000 points to speed up model calculations. ![]()
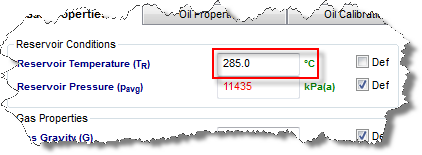
7. Click the Properties tab. Depending on the type of reservoir fluid specified earlier, click either the Gas Properties, Oil Properties, or Water Propertiessub-tabs. Change the Reservoir Temperature value and enter the fluid properties.
8. Calculate sandface pressures. ![]()
10. History match the PITA data.
11. (Optional) Create a forecast.
12. Collate the default Late Time, Early Time, and model reports. Then, save the collated report as a pdf file.