Determining a Shut-in Point
There is a module within the Production Editor tab where you can insert a shut-in point into your dataset. This is useful when a shut-in point is missing or isn't well defined. Determining a shut-in point can improve the look of the early time trend on derivative plots, and can improve the estimation of skin. Prior to inserting a shut-in point, ensure there is a zero rate close to the shut-in point entered in the Production Editor tab. The initial scale for the plots in the Determine Shut-in module depend on that shut-in point.
To determine a shut-in point:
1. Click the Det. Shut-in icon (![]() ) on the Production Editor toolbar.
) on the Production Editor toolbar.
A new window opens with four plots.
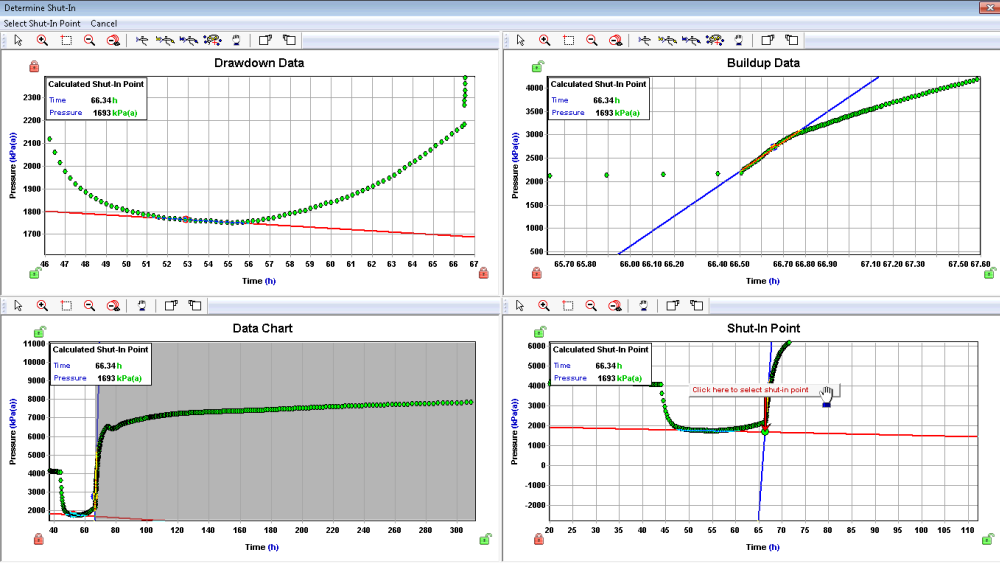
2. On the top left plot, position the line through the general trend of the drawdown (or injection) pressure data.
3. On the top right plot, position the line through the first few shut-in points.
4. Fine-tune the line positions on the Data Chart plot on the bottom left.
5. Check the shut-in point to be added on the Shut-in Point plot on the bottom right.
6. After you are satisfied with the shut-in point, click the Click here to select shut-in point box in the Shut-in Point plot, or click the Select Shut-in Point button in the top left of the module window. Then click Yes in the popup that opens.
The shut-in point will be inserted into the Production Editor tab.
7. Check the shut-in point on the Production Editor tab. Sometimes zero rates that were in the Production Editor tab prior to inserting the shut-in point need to be deleted manually.