 ).
).Set depth model properties including the overall size of the canvas, the depth increment with which to resample the impedance field, properties for scales, traces, correlations, and correlation nodes.
To change depth models
1. From the Edit menu, select Display
parameters ().
The Display Parameters: Depth Model
dialog box appears.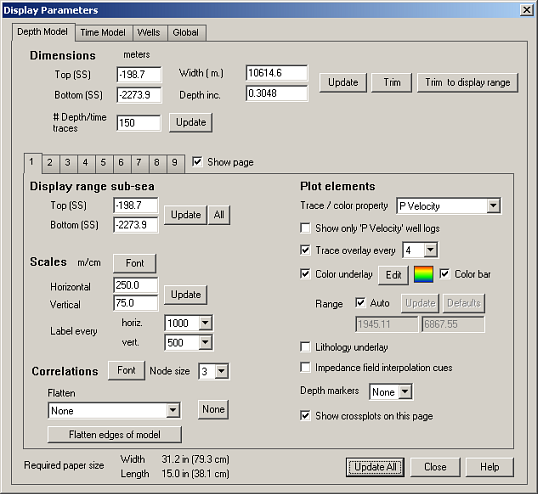
2. To change the
size of the main display, you can either drag and drop the canvas borders,
type different dimensions above, click Trim
and type a start or stop depth, or type a different display range
above. Trimming the model deletes well and correlation data with which
the new model borders intersect, while resizing the display simply moves
the canvas borders without affecting the underlying data.
3. Select a tab to configure and select Show page so that the tab also appears as a tab in the main window. To copy elements from one tab to another, select the elements from the Select a copy option drop-down list and then click Copy. Note that this can be used to update the existing tab with settings from another or to replicate settings from the current tab to another.
4. Select the options to define a geologic scenario, and then click Update All.
| Trimming Models | Configuring Zones |
| Creating Correlations | Changing Well Display Properties |
| Changing Log Display Properties | Printing Models |
| Changing Time Models |