Reports Tab
Subtopics:
Related Topics:
Preview Report Tab
In the Preview Report tab, you can view, collate, rearrange, and print existing reports. The reports in WellTest are dynamic in the sense that they are generated based on the number and types of analyses and models that have been created within a specific file. As a result, the reports available to be previewed vary from file-to-file.
The Preview Report tab is divided into two sections.
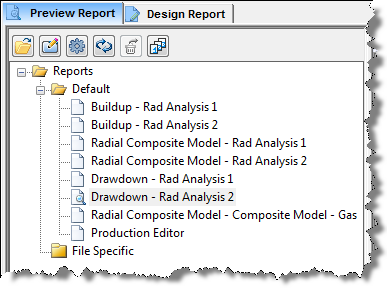
1. The left section displays a tree structure of available reports generated for the current file.
2. The main section displays a preview of the currently selected report.
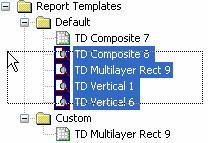
The reports displayed on the left are organized into Default, Custom and File Specific folders.
- Default — contains reports generated from default report templates. These reports can be edited in the Design Report tab, but cannot be deleted.
- Custom — contains reports generated from templates that were created or customized in the Design Report tab.
- File Specific — contains reports not generated from templates, but rather created or modified from existing default or custom reports. These reports are saved to the file, and are not available to other files.
Toolbar Icons
The Preview Report toolbar contains the following icons:
|
Icon |
Name |
Description |
|
|
Open Existing Report |
You can navigate to and open an existing report template (.PRT extension). If the report template being opened already exists in the application, it is automatically selected in the preview tree. If the report template being opened is not associated with the current application, then the template is displayed in the temporary folder. |
|
|
Change the report paths |
Launches the Report Paths window, where you can change the location where custom report templates are saved. By default, the report templates are located in:
In a network installation, this path may not be found on the C drive. In that case, the IT department may be required to help locate this folder. After the location of the report templates are determined, the path can be set by clicking the Browse icon. When this setting has been changed, WellTest must be restarted for the changes to take effect. Note that the Reset button can be used to clear all saved paths, and reset the save path to the default setting. |
|
|
Change Report Settings |
Opens the Report Settings window, where you can change whether or not the filename, file path, or date is displayed in the report footer. |
|
|
Reload reports from hard-drive |
Refreshes the view of the tree to reflect changes to the preview tree that may not have been displayed yet. In most cases, this is automatically done. |
|
|
Restore deleted report template(s) |
You can recover deleted reports from the current session of the application by opening the Retrieve Deleted Templates dialog box. Note: If a deleted report template is not recovered before the application is closed, it is permanently deleted. A warning is displayed when you exit the application to inform you if there are templates available to be recovered. Also, report templates in the default folder cannot be deleted. |
|
|
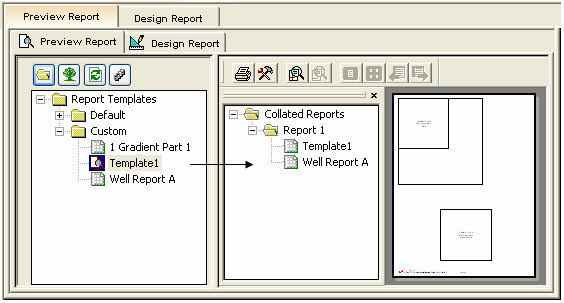
Collate Reports |
You can create groups of templates, which gives you the option of printing multiple templates at once. Clicking this option displays another tree next to the preview window.
|
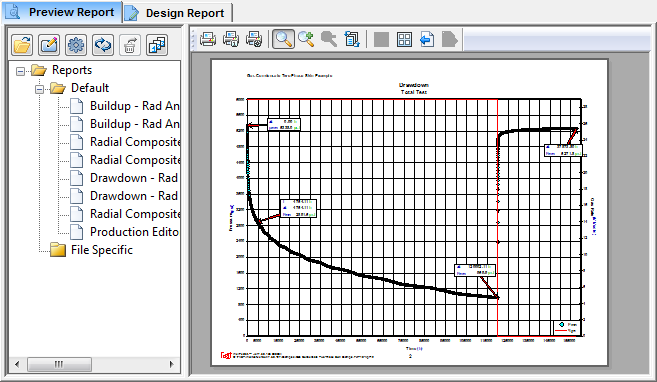
Preview Pane
The Preview pane contains a preview of the report that is currently selected.
The Preview pane contains the following icons:
|
Icon |
Name |
Description |
|
|
|
Sends the currently selected report to your default printer. |
|
|
Print the Current Page Only |
Prints only the currently selected page to your default printer. |
|
|
Print Setup |
Enables you to change printer options. |
|
|
Zoom Tool |
Enables you to zoom-in / zoom-out by clicking in the report. |
|
|
Magnify Image |
Enables you to zoom-in on a report. |
|
|
Reduce Image |
Enables you to zoom-out from a report. |
|
|
Rearrange Pages |
Enables you to view the thumbnail view of a multi-page report, and move the pages around. This option is meant for cases where there are multiple pages, such as a collated report. This option is grayed-out if the report template being viewed is a single-page report. |
|
|
Single Page |
Enables you to view the report one page at a time. This option is meant for cases where there are multiple pages, such as a collated report. This option is grayed-out if the report template being viewed is a single-page report. |
|
|
Multiple Pages |
Enables you to view the thumbnail view of a multi-page report. This option is meant for cases where there are multiple pages, such as a collated report. This option is grayed-out if the report template being viewed is a single-page report. |
|
|
Previous Page |
Enables you to move to the previous page of the current report template. This option is grayed-out if the report template being viewed is a single-page report. |
|
|
Next Page |
Enables you to move to the next page of the current report template. This option is grayed-out if the report template being viewed is a single-page report. |
Collated Reports
With a collated report, you can group several reports together, so you can print several reports at once. There are several options available when working with collated reports.
To display the current list of collated reports, click
the Collate Reports icon (![]() ).
).
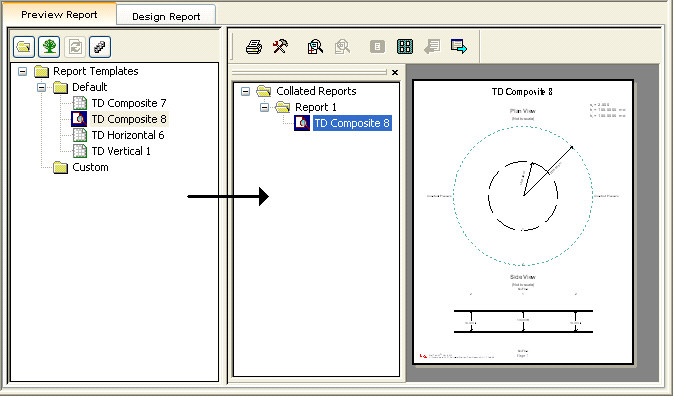
Report templates from the preview tree can be added to the collated reports folder by clicking-and-dragging a report template from the Report Templates folder in the left-side pane. Several reports may be selected at once by clicking-and-dragging a selection rectangle over the reports, or by selecting reports while pressing the Ctrl or Shift keys.
To create a new report folder, right-click the empty space within the Collated Reports window, and then select Create New Report.
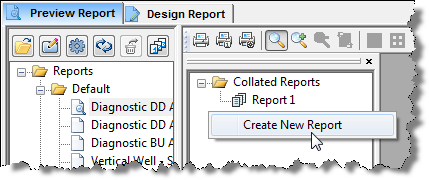
You can add reports from the preview tree to the Collated Reports folder. To do this, click the report name, then drag it to the Collated Reports folder. To select multiple templates, drag a selection box around the template names.
The order of report templates within a collated report may be changed by clicking-and-dragging them within the Collated Report tree view.
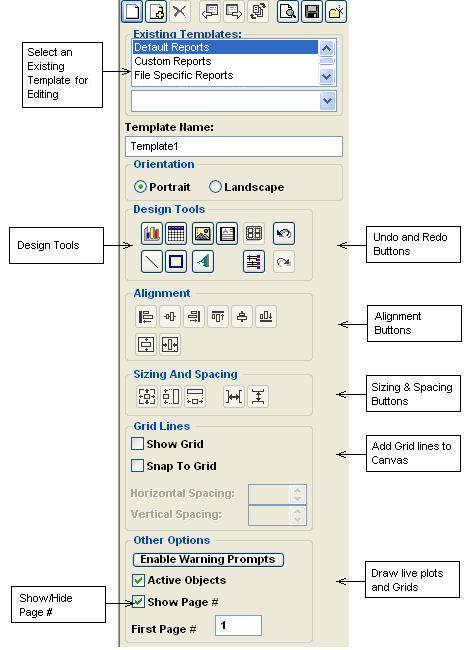
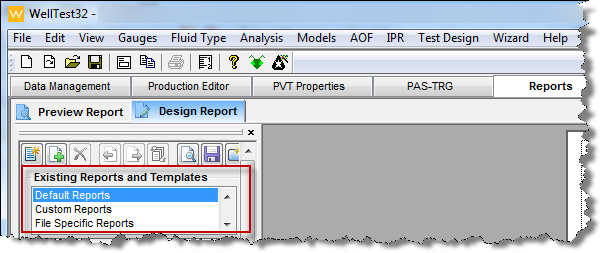
Design Report Tab
The Design Report tab has two sections.
1. The left section contains all of the tools required to modify and customize reports and templates.
2. The middle content pane is the canvas for design.
In the Design Report tab, you can design new reports and/or templates. With the reports, a tree structure is used to organize all the available data. When designing reports and/or templates, the tree is only populated with data available within that file. Therefore, prior to creating a report template for a model of a hydraulically fractured gas reservoir, a file with a fracture model and the reservoir fluid type set to gas should be created or opened.
Reports versus Templates
It is very important to distinguish between reports and templates prior to starting the design.
- Reports are generated from templates, or by modifying existing reports in the Design Report tab. For example, there is a pre-defined default template for a fracture model for a gas reservoir. If a specific file has the reservoir fluid type set to gas, and has three fracture models, three different reports are generated from that single report template. The values in each report correspond to the values in the model associated to it. Reports are file-specific. When reports are modified in the Design Report tab, the saved report file (with a .prt extension) is only available for that specific WellTest file.
- Templates refer to the report layout structure for a specific fluid type, and a specific analysis or model. Templates are used to generate reports for any file with a matching fluid type, and analysis or model type. In fact, if a file has multiple instances of the same analysis or model, the corresponding template is used to generate multiple reports. Templates are not file-specific. They are saved (with an .lof extension) to a specified location on the hard drive, or network. Custom templates may be created from scratch, or by modifying existing templates.
| Note: | You are likely to modify existing reports, and customize existing templates, rather than creating them from scratch. |
In the left section of the Design Reports tab, is the Existing Reports and Templates list where you may select the report or template to start from. After you have selected a report or template, a drop-down list displays all the reports or templates available for modification. If you start from a report (a file in the Default Reports, Custom Reports, File Specific Reports, or All Reports section), the modified file is saved as a report, and is displayed in the File-Specific section of the Preview Report tab, and is not available to other project files. If you start from a template (a file in the Default Reports, Custom Reports, or All Templates sections), the modified file is saved as a custom template and is used to create custom reports for similar WellTest files.
Toolbar Icons
The Design Report toolbar contains the following icons:
| Icon | Name | Description |
|---|---|---|
|
|
Create a new report template |
Starts a new report template. If an unsaved report template is active in the design view, you are prompted to save the current report, before a new report template is created. |
|
|
Add a New Page to current report template |
Inserts a blank page to the end of the current report template. |
|
|
Remove Current Page from report template |
Deletes the active page from the current report template. |
|
|
Previous Page |
Moves the template preview back by one page. |
|
|
Next Page |
Moves the template preview forward by one page. |
|
|
Rearrange Pages |
Displays all the pages in one view, so they can be rearranged by dragging- and-dropping pages. |
|
|
Preview Template |
Switches the view from the Design Report tab to the Preview Report tab. |
|
|
Save Template |
Saves the currently active report template. |
|
|
Add/Edit Template Locations |
You can change the default location for saved files. |
Hotkeys
When you are working in the report, the following hotkeys are available:
- Control A — Selects all objects on a report page.
- Control C — Copies the selected objects on a report page.
- Control D — Displays the order of objects on a report page. The order of reports can be changed by clicking the objects in a specific order.
- Control R — Saves the relative paths for all image files. (By default, absolute paths are used.)
- Control V — Pastes all copied objects on a report page.
- Control X — Cuts selected objects on a report page.
- Control Y — Redoes the last change on a report page.
- Control Z — Undoes the last change on a report page.
Default File Locations
By default, all newly created reports are saved to this location:
C:\ProgramData\Fast Fekete Associates Inc\WellTest32 <version>\Reports\Custom
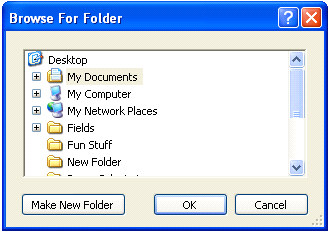
In a network installation, this path may not be found on the C drive. In that case, the IT department may be required to help locate this folder. After the location of the report templates are determined, the path can be set by clicking the Browse icon. When this setting has been changed, WellTest must be restarted for the changes to take effect.
If the software is installed on a location on a network with restricted user rights, the first time you create a report and try to save it, you are notified that you do not have access to the default location, and you are asked to provide an alternate location. However, you still have access to the original default location.
To change the location where files are saved, click the Browse... button.
By default, Fekete reports are included with the software. These reports are displayed under the Default folder in the preview tree. Dynamic reports (reports that are automatically created) reside in a temporary folder, and are not affected by changing the default folder's location.
Custom Templates
The following section describes the Existing Reports and Templates section of the Design Report tab.
- Default Reports — displays default reports applicable to the current WellTest file. The default reports can be accessed by clicking Default Reports in the Existing Reports and Templates section. After modifying a default report, assign a report name in the Template Name field. (If you do not assign a new name, the existing name is used and the report is added to File Specific Reports.) Click the Save report template button to save the report. The File Specific Reports are displayed in the File Specific folder in the Preview Report tab.
- Custom Reports — displays custom reports created from Custom Templates that are applicable to the current WellTest file. Custom reports can be accessed by clicking Custom Reports in the Existing Reports and Templates section. In the Preview Report tab, they are displayed in the Custom Templates folder. After modifying a custom report, assign a new report name, or that custom report name is used when the Save report template button is clicked. Modified custom reports are created under Modified Reports in Existing Templates, and are displayed in the File Specific folder of the Preview Report tab.
- Modified Reports — displays reports that have been modified from Default Reports, Custom Reports, and Modified Reports. The modified reports can be accessed by clicking Modified Reports in the Existing Reports and Templates section. It is displayed in the File Specific folder of the Preview Report tab. These reports are saved as part of the current file and do not get displayed in any other files.
- All Reports — displays the default, custom and modified reports available to the current file. All reports can be accessed by clicking All Reports in the Existing Reports and Templates section.
- Default Templates — displays all the default templates available in WellTest. The default templates can be accessed by clicking Default Templates in the Existing Reports and Templates section. The default templates can be used to create custom templates accessible by other WellTest files. After customizing a default template, assign a new report name or that default report name is used when the Save report template button is clicked. Customized default reports are created under Custom Templates in Existing Templates when a new template is created after clicking the Create a new report template button. The correct Layout Type and Preview Node must be selected using the drop-down menu in the Layout File Properties section. To display the drop-down menu, click the value in the Value field. After modifying the template, assign a new template name to create another template, or the template is updated with changes made when the Save report template button is clicked.
- Custom Templates — displays the custom templates. The custom templates can be accessed by clicking Custom Templates in the Existing Reports and Templates section. Custom templates can be created from default templates or custom templates. On the Preview Report tab, custom templates are displayed in the Custom Templates folder.
- All Templates — displays the default and custom templates. They can be accessed by clicking All Templates in the Existing Reports and Templates section.